The e-commerce industry continues to grow as more consumers prefer shopping online. Whether you’re planning to sell physical products, digital downloads, handmade goods, or services, having your own e-commerce website gives you complete control over your brand, customer experience, and profits.
Many beginners assume building an online store requires advanced coding skills or a large budget. The good news is that modern tools and platforms have made it easier than ever to create a professional e-commerce website from scratch.
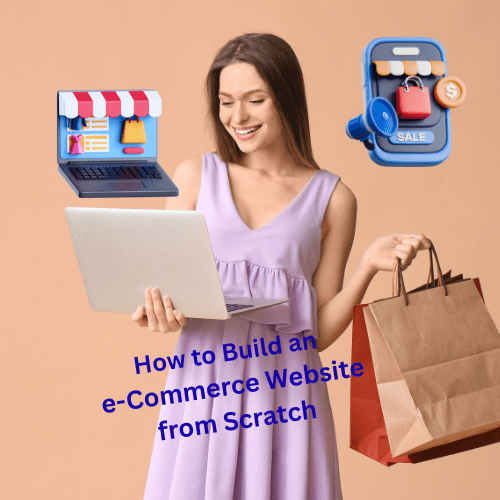
Discover how to build an e-commerce website from scratch (from choosing a niche to launching your store and attracting customers).
How to Build an e-Commerce Website from Scratch (Guide for Beginners)

Why Build Your Own e-Commerce Website?
Creating your own online store offers several advantages:
- Full control over branding and design
- Lower selling fees compared to marketplaces
- Direct access to customer data
- Better profit margins
- Ability to scale your business
- Greater flexibility for marketing and promotions
Instead of relying solely on platforms like Amazon or Etsy, your website becomes a valuable digital asset that you own.
Step 1: Define Your Business Idea and Niche
Before building your website, determine what you plan to sell.
Ask yourself:
- What products or services will I offer?
- Who is my target audience?
- What problem does my product solve?
- Who are my competitors?
- What makes my store unique?
Examples of Profitable Niches
- Fitness products
- Beauty and skincare
- Home décor
- Pet supplies
- Digital products
- Electronics accessories
- Sustainable products
- Fashion and apparel
Conduct market research to validate demand before investing time and money.
Step 2: Choose a Domain Name
Your domain name is your website’s address on the internet.
Examples:
- yourstore.com
- bestfitnessgear.com
- ecohomeshop.com
Tips for Choosing a Domain
- Keep it short and memorable.
- Make it easy to spell
- Avoid numbers and hyphens.
- Use keywords when relevant.
- Choose a .com extension if available.
A good domain name strengthens your brand and improves customer trust.

Step 3: Select a Hosting Provider
Web hosting stores your website files and makes them accessible online.
What to Look for in Hosting
- Fast loading speeds
- High uptime guarantee
- SSL security certificate
- Daily backups
- Scalability
- Good customer support
Popular Hosting Options
- Bluehost
- SiteGround
- Hostinger
- A2 Hosting
- Cloudways
If you’re using a self-hosted platform like WooCommerce, choosing reliable hosting is critical.
Step 4: Choose an e-Commerce Platform
An e-commerce platform provides the tools needed to manage products, payments, inventory, and customers.
Option 1: Shopify
Best for beginners.
Pros:
- Easy setup
- Secure hosting included
- Professional templates
- Excellent support
Cons:
- Monthly subscription fees
- Limited customization without apps
Option 2: WooCommerce
Best for flexibility and control.
Pros:
- Free plugin
- Full ownership
- Highly customizable
Cons:
- Requires WordPress management
- Slightly steeper learning curve
Option 3: Magento
Best for large businesses.
Pros:
- Enterprise-level features
- High scalability
Cons:
- Complex setup
- Requires technical expertise
Option 4: BigCommerce
Best for growing online stores.
Pros:
- Built-in features
- Strong SEO tools
Cons:
- More expensive as your store grows
For most beginners, Shopify and WooCommerce are the best starting points.

Step 5: Install and Configure Your Website
Once you’ve chosen your platform:
For WooCommerce
- Install WordPress
- Install the WooCommerce plugin.
- Follow the setup wizard.
- Configure:
- Currency
- Shipping locations
- Tax settings
- Payment methods
For Shopify
- Create an account
- Select a plan
- Configure store settings
- Add products
- Connect domain
At this stage, your store foundation is ready.
Step 6: Design Your Online Store
First impressions matter.
A professional design increases trust and improves conversion rates.
Essential Pages
Homepage
Include:
- Featured products
- Promotions
- Value proposition
- Customer testimonials
Product Pages
Include:
- High-quality images
- Detailed descriptions
- Pricing
- Reviews
- Shipping information
About Us Page
Tell your brand story and build trust.
Contact Page
Provide:
- Contact form
- Email address
- Phone number (if applicable)
FAQ Page
Answer common customer questions.
Privacy Policy and Terms
These pages help ensure legal compliance.
Step 7: Add Products
Your product listings can significantly impact sales.
Product Information Checklist
- Product title
- Description
- Features
- Benefits
- Specifications
- Images
- Pricing
- Inventory levels
- Shipping details
Product Photography Tips
- Use high-resolution images
- Show multiple angles
- Include zoom functionality
- Use consistent backgrounds
Good product presentation increases customer confidence.

Step 8: Set Up Payment Gateways
Customers need secure payment options.
Popular Payment Methods
- Credit cards
- Debit cards
- PayPal
- Apple Pay
- Google Pay
- Stripe
Security Best Practices
- Install SSL certificates
- Use trusted payment providers.
- Enable fraud protection
- Follow PCI compliance guidelines.
A secure checkout process reduces cart abandonment.
Step 9: Configure Shipping Options
Shipping can influence purchasing decisions.
Common Shipping Models
Free Shipping
Attracts customers and boosts conversions.
Flat Rate Shipping
Charges a fixed shipping fee.
Real-Time Carrier Rates
Calculates shipping based on customer location.
Shipping Information to Include
- Delivery times
- Shipping costs
- Return policies
- International shipping availability
Transparency reduces customer frustration.
Step 10: Optimize for Mobile Devices
Mobile commerce now accounts for a significant portion of online purchases.
Your store should:
- Load quickly
- Display properly on smartphones.
- Have easy navigation
- Offer a mobile-friendly checkout.
Test your site across multiple devices before launching.
Step 11: Improve Website Speed
Website performance directly affects sales and SEO rankings.
Speed Optimization Tips
- Compress images
- Use caching
- Minimize plugins
- Enable CDN services
- Optimize code and scripts.
A fast website improves user experience and conversion rates.

Step 12: Implement SEO Best Practices
Search Engine Optimization helps customers find your store through Google.
On-Page SEO Checklist
Keyword Research
Target keywords like:
- Buy fitness equipment online.
- Handmade jewelry store
- Organic skincare products
Optimize Product Pages
Include keywords in:
- Titles
- URLs
- Descriptions
- Meta tags
Create Blog Content
Publish articles related to your niche.
Examples:
- Buying guides
- Product comparisons
- Industry trends
- How-to tutorials
Content marketing attracts organic traffic over time.
Step 13: Set Up Analytics and Tracking
Data helps you understand customer behavior.
Essential Tools
- Google Analytics
- Google Search Console
- Meta Pixel
- Conversion tracking tools
Track metrics such as:
- Website traffic
- Conversion rate
- Bounce rate
- Revenue
- Average order value
These insights help improve performance.
Step 14: Test Everything Before Launch
Before going live, test every aspect of your store.
Launch Checklist
✓ Product pages work correctly
✓ Checkout process functions properly
✓ Payment gateways process transactions
✓ Shipping calculations are accurate
✓ Mobile responsiveness is verified
✓ Forms and emails work correctly
✓ SSL certificate is active
✓ Website speed is optimized
Testing prevents costly mistakes after launch.

Step 15: Launch Your Store
Once everything is ready:
- Remove maintenance mode
- Announce the launch on social media.
- Send emails to subscribers.
- Offer launch discounts
- Encourage customer reviews
Your e-commerce business is now officially live.
Step 16: Market Your e-Commerce Website
Launching is only the beginning.
Effective Marketing Strategies
Search Engine Optimization (SEO)
Generate long-term organic traffic.
Social Media Marketing
Promote products through:
- TikTok
Email Marketing
Build a subscriber list and nurture customers.
Influencer Marketing
Partner with niche influencers.
Paid Advertising
Run campaigns using:
- Google Ads
- Facebook Ads
- Instagram Ads
A multi-channel marketing strategy generates consistent sales.

Common Mistakes Beginners Should Avoid
Many new store owners make avoidable mistakes.
Avoid These Errors
- Choosing the wrong niche
- Ignoring SEO
- Using poor product images
- Complicated checkout processes
- Slow website performance
- Lack of customer support
- No mobile optimization
- Not tracking analytics
Learning from these mistakes can save significant time and money.
Estimated Cost of Building an e-Commerce Website
| Expense | Estimated Cost |
|---|---|
| Domain Name | $10–$20/year |
| Hosting | $5–$50/month |
| Premium Theme | $50–$200 |
| SSL Certificate | Often free |
| Plugins/Apps | $0–$100/month |
| Marketing | Variable |
A beginner can often launch a professional online store for under $500.
How to Build an e-Commerce Website (Tips)
Building an e-commerce website from scratch may seem overwhelming at first, but by following a structured process, even beginners can create a professional and profitable online store.

Start by selecting a niche, choosing the right platform, designing a user-friendly website, and implementing secure payment and shipping systems. Once your store is live, focus on SEO, content marketing, and customer experience to drive long-term growth.
Remember that successful e-commerce businesses are built through continuous improvement. Monitor your analytics, listen to customer feedback, and optimize your store regularly to increase conversions and revenue.
The best time to start your e-commerce journey is today.
AI Tools for You
https://www.bestprofitsonline.com/myblog/newai
AI-Powered Instagram and TikTok Growth – Free Trial
How to Increase Followers and Boost Engagement